How to DIY E-Liquid
So, you’ve been vaping for quite some time now and may have been curious about creating your own DIY e-liquid, or maybe you’ve thought of a mouthwatering flavour but struggling to find it anywhere.
Creating your own vape juice is the perfect way to take full control of your vaping journey, you’ll save money in the long run, vape one-of-a-kind juices, and become the superior vaper!
We’re experts in everything e-liquid related, so we thought we’d create the ultimate DIY e-liquid guide to pass on our knowledge so you know exactly what to do to create your very own tasty vape juice - so let’s get into it!
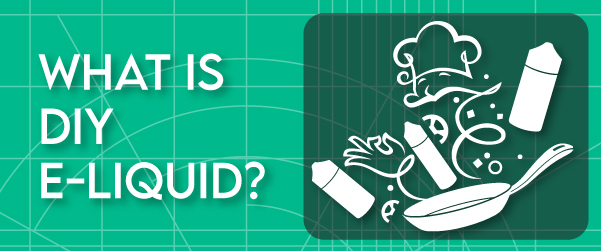
What is DIY E-Liquid?
But what exactly is DIY vape liquid? DIY vape juice is essentially creating your own bespoke e-liquid to fit your own tastes and preferences, exactly the same as the store-bought e-liquid but with your personal stamp on it.
Making your own allows you to control the flavour, nicotine intensity, and, most crucially, how to efficiently split the cost of vaping.
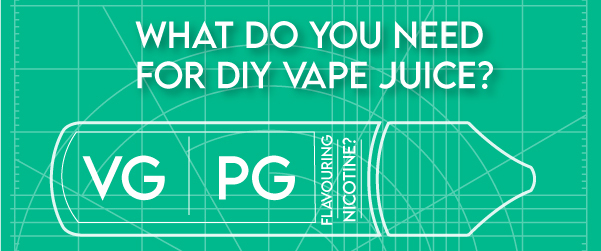
What Do You Need for DIY Vape Juice?
If you look at the label of your ordinary vape juice, it’ll say:
- Vegetable Glycerin
- Propylene Glycol
- Flavouring Concentrate
- (and maybe, nicotine salt/standard nicotine)
But what do you need for your homemade e-liquid?
- Vegetable Glycerin
- Propylene Glycol
- Flavouring Concentrate
- (and maybe, nicotine salt/standard nicotine)
They’re exactly the same ingredients. So you can create the same, or even better, liquids than the ones you’re buying now!
So you’ve probably guessed it, you won’t need too many ingredients to get started.
Propylene Glycol (PG)
Propylene glycol is used in DIY vape juice recipes, but not as much as vegetable glycerin this is because PG creates the base of e-liquid and is the carrier for the flavourings.
It is thinner and creates less vapour than VG. It is used to create the 'throat hit' of DIY e-juice. It's also useful for getting an e-liquid to flow and wick more readily.
Or you can buy a premixed VG/PG base in either 50/50 or 70/30.
Vegetable Glycerin (VG)
Vegetable glycerin is a dense substance that tends to pour slowly. VG produces bigger clouds but has a lower throat hit.
It can be combined in various proportions depending on your vaping style and personal taste preferences. So, you’ll need to make sure to get a large bottle of this.
Nicotine
Now, this is an optional ingredient to add to your mix, with the option of adding flavourless standard nicotine or nicotine salts to your e-liquid.
We sell them as 10ml nicotine shots in either a 50/50 mix or a 70/30 mix.
Flavours
Flavour concentrates are the types of flavours you will be mixing into your bespoke vape juice. They’re smaller bottles but that’s because they’re highly concentrated, only needing a few drops to come up with your new creation.
You choose between countless flavours to mix and match in your very own e-liquid!
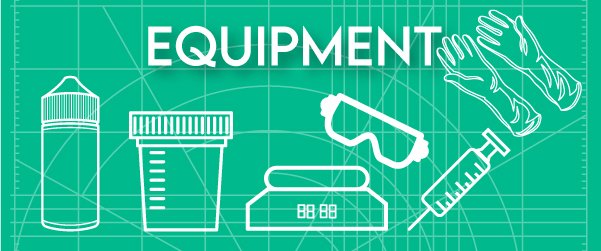
Equipment
But other than the main ingredients, you’ll need to stock up on all the equipment to make your own e-juice.
Empty Bottles
Obviously, you’ll need somewhere to store all of your new creations!
We recommend using the Chubby Gorilla 120ml Bottles - we use these ourselves so we know they’re premium quality.
Measuring Containers
You’re going to need to be precise with each ingredient that you’re mixing, for both small and large amounts.
Scales
For a highly accurate measurement of your ingredients, weigh your ingredients by weight instead of volume with scales.
(We will go more in-depth about weighing with scales further down)
Syringes/Pippettes
You don’t want to be pouring those sticky substances everywhere! Getting equipped with multiple different sizes of syringes makes it easier to get the right quantity of each ingredient into your DIY mix.
Rubber Gloves
Now, this is vital. Especially when you’re mixing in your nicotine.
Liquid nicotine is highly dangerous and can be absorbed through your skin, which can make you seriously ill.
We would recommend getting powder-free gloves to ensure your DIY mix stays pure, your hands and skin are safe, and no added contamination.
Safety Glasses
Just to be cautious, adding safety glasses to your DIY equipment can be beneficial. Especially when it’s your first time, you’ll be sure to have a few splashes coming your way and there’s nothing worse than a foreign high-strength liquid getting into your eyes.
Labels
You don’t want to get your new delicious vape liquid mixed up with a weird, questionable creation!
Adding labels to each bottle of vape juice will help to decrease the chances of any mishaps.
Tissue Paper or Napkins
The tissue paper will be used to clean up any spilt liquid. It's better to be safe than sorry, especially if you're learning how to produce your own e-liquid because even the best among us make mistakes.

Mixing By Volume vs Weight
When it comes to measuring your ingredients, using scales to measure by weight rather than by volume will give you highly accurate results, much faster and a lot less messy!
Mixing by volume: Using a big collection of syringes—ideally one for each ingredient—you can measure the volume of each ingredient while mixing by volume.
Since liquids are typically measured in this way, it is the simplest for a beginner to learn, but it is also less accurate, needs more supplies, and requires more maintenance.
Calculators are still useful when mixing by volume because they not only convert percentages to ml for you but also provide the exact amount of nicotine base needed to achieve the desired strength.
Mixing by weight: Using a scale, each ingredient is weighed and its specific gravity is taken into account before being added to the mix.
Think about it this way, because of the thickness of VG, 1ml of VG weighs more than 1ml of PG or flavour concentrate so it doesn’t hurt to be more precise. But don't worry about the maths, simply utilise a vape juice calculator that takes these variables into account and let it do the hard work for you!
Please remember not to guess the measurement of nicotine liquid when creating your vape juice!

What to Avoid
Now, you know what you need to get started, but what do you need to avoid?
Firstly, avoid mixing manufacturers, when you start your DIY vape juice journey, stick to ingredients that come from the same place, so you know that when you’re mixing the ingredients they work together.
Don’t start guessing ingredient quantities, you need to be following the guidelines to a T, especially when you’re using liquid nicotine. Make sure you’re using our E-Liquid Mixing Calculator to know exactly how much you need.
When you first start crafting your homemade vape liquid, you may want to go berserk with the flavourings, but these are super concentrated and less is always more! So take your time with finding your new favourite mix.
Even though something may say flavouring, never add in flavourings that aren’t made for vaping, it's highly dangerous and can ruin your vape!
And never think you’re above safety, always mix your creations in a ventilated room wearing your gloves, and goggles, and have a lot of tissue to wipe up your mess.

1. Get your station ready
The first thing you need to do is get ready to start mixing your e-juice! Get only the ingredients and equipment you will need on a wide, clean surface.
2. Check your mixing calculator
Enter your recipe and quantities into a vape juice mixing calculator for a smooth, flavoursome liquid.
3. Start with your nicotine
This is one of our tips, nicotine is so dangerous if it gets splashed about and ends up landing on your skin, so start out with pouring your nicotine first so it’s out of the way and done with (and you won’t accidentally add it twice)
After you have the quantity of nicotine from the mixing calculator, use a syringe or pipette to measure out the nicotine (or you can weigh up the liquid using a weighing scale, but be careful not to get any on your skin)
4. Add your flavours
Next, add in the drops of your chosen e-liquid flavour concentrates. Get creative but remember, less is always more.
We recommend doing this before adding in your base ingredients in case anything goes south, you’ve at least not wasted the main ingredients.
5. Add in your base
According to your requirements from the mixing calculator, add in the quantities of VG and PG.
We recommend adding in your PG first as it’s better to have a vape liquid that is too thin than it is to have one that's too thick.
If you want an e-liquid with a powerful throat hit and intense flavour, use more PG in your mixing ratio.
If you want a thicker e-liquid, perhaps for sub-ohm vaping or thicker clouds of vapour, add extra VG while mixing.
6. Shake!
Now that all of your liquids are in one bottle, vigorously shake that bottle for at a minimum a whole minute. And then probably for another minute to be safe.
7. Label
Now, before you put that bottle away and forget about your bespoke recipe, add your label to the product whilst it’s still fresh in your mind.
We recommend labelling the name of your new e-juice, the date it was mixed, the VG/PG ratio, and the nicotine concentration.
8. Store & steep
Congratulations, you’ve nearly finished your homemade vape juice! Possibly the worse part now, storing away your liquid to allow it to mellow.
You could technically vape it straight away, but we can’t promise it’ll be very tasty.
Store your vape juice in a cold, dark place, such as a cupboard, with the lids off.
Allowing your e-liquid to breathe can darken it and intensify the flavour significantly. The average steep time is about 4-5 days, so hopefully you have something to vape whilst you wait!

Our Tips & Tricks
When it comes to DIY e-liquid, there is no right or wrong flavour remedy, but what is phenomenal is the ability to entirely control your vaping experience.
So here are a few of our experts' tips for you:
- To enhance your unique e-liquid with a cool, chilling inhale, add in our Koolada E-Liquid Concentrate, a super-cool additive that’s designed to give your e-liquid an icy finish!
- To make the process a bit simpler, start with a premixed VG PG Base whilst you are discovering new flavours, and then when you’ve mastered your unique juice, start playing around with the ratio of VG/PG
- If you're mixing several bottles, place them all in an empty pillow case and drop them in the washing machine; set it to 'spin' and it'll do all of the hard work for you!
- E-liquids with a high VG concentration are more suited for sub-ohm vaping since they produce larger clouds and, because VG is dense, it requires more heat from the vape.
- To get the best outcome from your e-liquid mixes, weigh your ingredients on scales rather than using volume measurements.
DIY mixing is all about trying new things. Because everyone has different tastes, you can only make a 'good' juice if you figure out what works for you.
You won't be able to manufacture flawless vape juice every time, but you can make notes on the e-liquids you liked and disliked, what made them work and what caused them to fail so you can keep improving your homemade liquid skills.
So, you should now be able to create the most delicious vape juices in the comfort of your own house! Remember that slow and steady wins the race, so take your time with your masterpieces and share them with us!